Saltillo Tile: Complete Guide to Installing and Styling
Did you know many authentic clay floors have real paw prints from animals? These charming imperfections make these floors a favorite for adding character to homes.
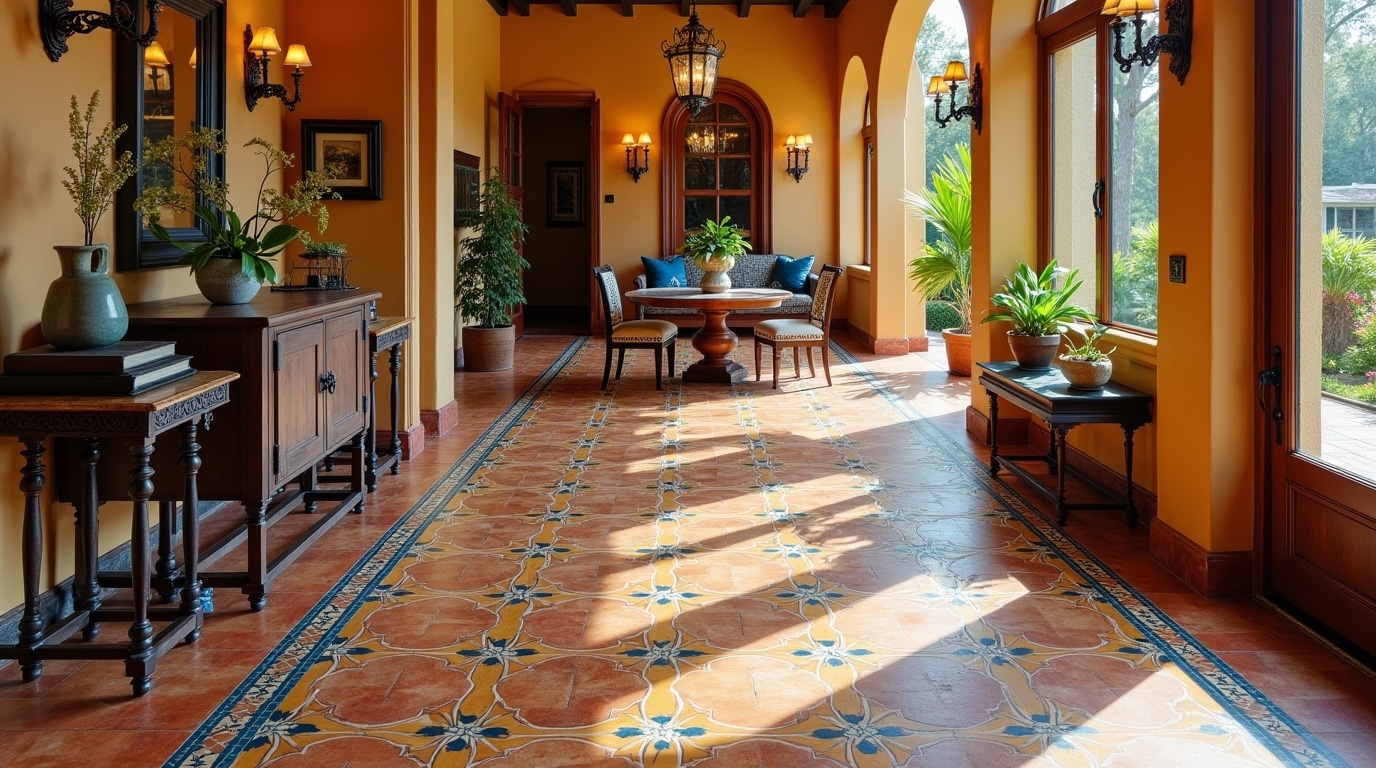
Adding this rustic flooring to your Saltillo tile home decor project brings unmatched warmth. These sun-baked squares are timeless, fitting both modern and traditional styles.

Our guide covers the key steps for a professional installation. By following our advice, you’ll confidently turn your floors into a durable and beautiful masterpiece that will last for generations.
Key Takeaways
- Authentic clay flooring provides a unique, rustic aesthetic for any interior.
- Natural variations in color and texture create a one-of-a-kind floor design.
- Proper sealing is critical to ensure long-term durability and stain resistance.
- Professional installation techniques help prevent cracking and uneven surfaces.
- This material is an eco-friendly choice for sustainable building projects.
Understanding the Characteristics of Authentic Saltillo Tile
Looking at a Saltillo tile floor is like seeing centuries of clay history. These tiles come from Saltillo, Coahuila, in Northern Mexico. The local soil is perfect for making high-quality terracotta.
The History and Craftsmanship of Mexican Clay Tiles
The making of these tiles is rooted in traditional methods passed down through generations. Artisans use natural clay, which they hand-press into wooden molds. This creates the shapes we know today.
After shaping, the tiles are fired in large kilns. This firing process gives them stunning color variations. You’ll see everything from soft yellows to deep reds. Because the fire is uneven, no two tiles are alike.
“The beauty of handmade terracotta lies in its imperfections; each tile tells a story of the earth and the hands that shaped it.”
Identifying Quality and Variations in Handmade Terracotta
Telling real, handmade terracotta from fake is key for homeowners. Real Saltillo tiles have small chips or animal prints from drying outside.
On the other hand, fake tiles look too perfect. Look for natural color depth and thickness variations in genuine craftsmanship.
| Feature | Authentic Saltillo | Mass-Produced Imitation |
|---|---|---|
| Production | Hand-pressed in molds | Machine-pressed |
| Color | Varied, natural earth tones | Uniform, synthetic look |
| Texture | Irregular, rustic surface | Smooth, consistent finish |
| Durability | High with proper sealing | Varies by material quality |
Choosing real materials makes our floors have timeless character. Only true Mexican terracotta can offer this. Always check where your tiles come from to get the genuine, high-quality product your home needs.
Essential Tools and Materials for Your Installation
Starting a tile project right means getting the right tools. You need top-notch tools and the right materials for a great job. We think getting ready well is the key to a lasting and lovely floor.
Selecting the Right Thin-Set Mortar and Grout
Choosing the right bonding agent is key for natural clay tiles. These tiles are porous and can move a bit. So, you need a flexible thin-set mortar to stop cracks.
For grout, think about your joint size. Wider gaps need sanded grout, perfect for rustic looks. Make sure your grout works well in moist places like kitchens or entryways.
Safety Gear and Cutting Equipment Requirements
When fitting tiles, precision is everything. Use a professional-grade wet saw with a top-notch diamond blade. It makes clean cuts and cuts down on dust.
Your safety is most important. Always wear eye protection and a dust mask to avoid dust and debris. Durable work gloves also protect your hands from the heavy tiles.
Preparing the Subfloor for a Durable Foundation
Your flooring project’s success begins before laying the first tile. The longevity of your floor heavily relies on subfloor preparation quality. Skipping these steps can lead to uneven wear or structural failure over time.
Whether you’re working with concrete or plywood, the surface must be perfectly prepared. This ensures the floor can handle the weight and nature of clay tiles. Inspecting and treating your foundation is key for a professional result that lasts decades.
Ensuring a Level and Clean Surface
A level surface is essential to prevent tiles from rocking or cracking. Use a high-quality self-leveling compound for concrete slabs with dips or uneven patches. For plywood subfloors, ensure all panels are securely fastened and show no movement or deflection.
Cleanliness is also critical for a strong bond. Remove all dust, grease, paint, and loose debris from the area. A thorough cleaning with a vacuum or stiff-bristled broom prepares the surface for mortar to adhere properly.
Applying Crack Isolation Membranes
Even a perfectly level floor can experience minor shifts due to temperature changes or house settling. Installing a crack isolation membrane is recommended. It acts as a protective barrier between the subfloor and your tiles, absorbing structural movement and preventing it from affecting the clay.
Applying this membrane is a simple process that adds a significant layer of security to your investment. It decouples the tile from the subfloor, minimizing the risk of future cracks. This step provides peace of mind for years to come.
| Subfloor Type | Preparation Task | Key Benefit |
|---|---|---|
| Concrete Slab | Grind high spots and fill cracks | Prevents tile rocking |
| Plywood | Secure loose panels and screws | Eliminates floor deflection |
| All Surfaces | Apply crack isolation membrane | Protects against structural shifts |
Planning the Layout and Pattern Design
A successful flooring project starts long before you lay the first tile. Proper planning helps avoid waste and ensures your floor looks great. It’s all about making your vision come to life.
By planning ahead, you dodge common DIY mistakes. Think of your floor as a canvas. Every measurement adds to the room’s harmony.
Measuring Your Space for Optimal Tile Placement
Getting your measurements right is key to a smooth install. First, figure out your room’s total square footage. Don’t forget about corners and doorways.
It’s wise to add 10% to 15% extra material to your order. This extra helps with cuts and ensures matching tiles if needed.
“Measure twice, cut once” is more than just a cliché; it is the golden rule of craftsmanship that saves both time and money.
Choosing Between Traditional and Modern Patterns
The pattern you pick sets the mood of your space. A traditional grid layout is clean and classic. It showcases the beauty of each clay tile.
For something more exciting, try herringbone or staggered offset patterns. These add movement and interest, guiding your eye around the room.
Your choice should match your home’s style. Whether it’s a simple stack or a complex weave, intentional design makes your terracotta floors stand out.
Executing the Installation Process
Transforming your room starts when you lay the clay tiles. This step needs patience and care to keep your floor level and looking good for years. Work in small areas to avoid the mortar drying out before you can place the tiles.
Applying Mortar and Setting the Tiles
Begin by applying thin-set mortar with a notched trowel. This tool helps create ridges for better adhesion. Hold the trowel at a 45-degree angle for even mortar depth. Always press each tile firmly into the bed with a twist to remove air pockets and bond well.
“The secret to a perfect Saltillo floor lies in the quality of your mortar bed; take your time to ensure every tile is fully supported.”
Managing Spacing and Grout Lines
Handmade terracotta tiles have irregular edges, making even grout lines hard. Use plastic spacers for uniform layout, adjusting for the clay’s natural variations. Consistency is key for that rustic look without compromising strength.
| Tool Name | Primary Function | Best Practice |
|---|---|---|
| Notched Trowel | Mortar Application | Use 1/2 inch notches |
| Rubber Mallet | Tile Leveling | Tap gently to set |
| Tile Spacers | Gap Alignment | Remove before grouting |
Cutting Tiles for Edges and Corners
Working with walls and corners needs precise measurement and the right tools. A wet saw with a diamond blade is best for cutting through dense clay. Always measure twice before cutting, considering the grout line width.
For tight corners, use a tile nipper for small adjustments. Always wear safety gear, like goggles and gloves, when cutting. These precautions help your installation look professional and fit perfectly.
Grouting and Initial Cleanup
Now, grout turns your clay tiles into a single, stunning surface. This step is essential for securing your tiles and bringing out the floor’s unique look. Doing it right makes your installation look professional and last long.
Selecting Grout Colors for a Rustic Aesthetic
Picking the right grout color is a creative choice that affects your home’s rustic aesthetic. We suggest colors that match the natural look of clay. Warm sand, beige, or light gray are great for a soft, organic feel.
For a bold look, try a darker grout to make each tile stand out. This contrast shows off the handcrafted variations and unique edges of terracotta. Always test a small area first to make sure the color is right for you.
Techniques for Clean Grout Application
Grouting clay tiles needs patience and precision. Saltillo tiles soak up a lot, so use a good grout release or sealer first. This protective barrier stops the grout from staining the tiles while you work.
Use a rubber grout float to press the grout into the joints. Work in small areas to clean up before the grout sets. Use a damp sponge to remove excess, rinsing it often to keep the surface clean.
Consistency is key when cleaning the tiles to avoid mistakes. If you see haze, clean it off right away with a dry cloth. These steps now will save you time and effort later.
Sealing and Protecting Your Saltillo Floors
Saltillo tile is naturally porous, so a good sealer is key for lasting protection. Without a seal, these clay tiles can soak up spills, oils, and moisture, causing permanent stains. It’s important to seal them right after the grout has dried to keep your floors looking great.
Choosing Between Penetrating and Topical Sealers
Choosing a sealer means picking between penetrating and topical types. A penetrating sealer goes deep into the tile’s pores. It keeps moisture out while keeping the tile’s natural look.
A topical sealer forms a protective film on the tile’s surface. It’s great for a shiny finish that highlights the tile’s colors. But, it might need more upkeep to avoid scuffs or peeling.
Applying the First Coat for Maximum Protection
Sealing starts with a clean, dry floor. Make sure to remove all dust and grout haze before sealing. Use a quality applicator pad or soft brush for even coverage.
Apply the first coat in thin layers for deep absorption. Consistency is key to avoid streaks or puddles. Wait for the first layer to dry fully before adding a second coat for extra protection.
Mastering Saltillo Tile Home Decor
Adding Saltillo tile home decor to your home connects old and new. These handmade clay tiles bring warmth like no other. The right layout can turn any room into a stylish retreat.
Integrating Southwestern Tile Decor into Modern Spaces
Some think clay tiles don’t fit with modern styles. But Southwestern tile decor looks great with simple, white walls and neutral furniture. Let the tile’s natural colors be the room’s main color.
Keep decor simple to highlight the tile. Natural wood and soft fabrics connect the rustic tile with modern design. This makes the space feel planned, not cluttered.
Balancing Rustic Tile Home Accents with Contemporary Furniture
Mixing rustic tile home accents with modern furniture creates a stunning contrast. The tile’s rough texture looks amazing with smooth materials like glass or leather. This mix keeps the room fresh and interesting.
Here are some tips for a professional look:
| Design Element | Modern Approach | Rustic Integration |
|---|---|---|
| Furniture Style | Low-profile, clean lines | Warm wood, woven textures |
| Color Palette | Monochromatic neutrals | Earthy terracotta, ochre |
| Lighting | Recessed or industrial | Wrought iron, warm bulbs |
| Textiles | Solid, smooth fabrics | Patterned rugs, wool throws |
By focusing on these contrasts, we keep our design cohesive. Thoughtful placement of furniture lets the tile’s beauty shine. We aim to make a space that feels both rooted and up-to-date.
Creative Mexican Tile Decorating Ideas
Clay tiles are not just for floors. They can transform any room with their timeless warmth. By using them creatively, you can turn ordinary surfaces into eye-catching features.
Using Terracotta Tile Interior Design in Kitchens and Patios
Terracotta tile interior design adds a rustic charm to kitchens. Many people use them as a backsplash for an earthy look. The clay’s natural texture pairs well with both modern and traditional decor.
Outdoors, terracotta tiles are great for patios or wall accents. They’re inherently durable and look good in all weather. They help connect your indoor and outdoor spaces beautifully.
Incorporating Handmade Clay Tile Decorations in Entryways
Your entryway is the first thing people see, making it perfect for handmade clay tile decorations. These tiles are durable and get better with age. Use them for a decorative border or a central medallion to welcome guests with style.
These tiles are great for those who love handmade items. They can be simple or complex, always adding a touch of authenticity. Here’s a table to help you choose the best spot for your tiles.
| Application Area | Primary Benefit | Design Style |
|---|---|---|
| Kitchen Backsplash | Heat Resistance | Rustic Modern |
| Outdoor Patio | Weather Durability | Mediterranean |
| Entryway Floor | High Traffic Wear | Traditional |
| Mudroom Walls | Easy Maintenance | Southwestern |
Advanced Spanish Tile Home Styling Tips
Adding the right finishing touches can make a simple floor stand out. To achieve a high-end look with Spanish tile home styling, balance and contrast are key. By highlighting your clay floors’ unique qualities, you can create a space that feels both timeless and thoughtful.
Layering Textures with Natural Tile Home Accents
The earthy feel of terracotta looks great with soft, tactile materials. We suggest adding natural tile home accents like jute rugs, woven baskets, or linen throw pillows. These items bring a raw beauty that matches the clay, making the room feel welcoming.
Adding wooden furniture with visible grain or leather seating can warm up the space. These textures keep the room cozy and prevent it from feeling too cold. Layering these elements showcases the authentic character of the handmade tiles.
Enhancing Mediterranean Tile Decorating Tips with Lighting
Lighting plays a big role in showing off handmade clay’s unique features. For Mediterranean tile decorating tips, choose light sources that add depth and dimension. Warm-toned bulbs are great for bringing out the terracotta’s rich, sunset colors.
Directional lighting, like wall sconces or track lights, can create soft shadows on the tiles. This highlights the subtle imperfections and texture that make each tile unique. By adjusting light and shadow, your floor becomes a dynamic feature that changes with the day.
Maintenance and Long-Term Care
Keeping your natural clay surfaces in top shape starts with knowing how to clean and seal them. These tiles are porous, so they need a special care routine. By sticking to a regular cleaning schedule, you can avoid damage and keep the warm, rustic aesthetic of these floors.
Routine Cleaning Methods for Terracotta Surfaces
Keeping your floors clean every day is key. Use a soft-bristled broom or a vacuum with a hard-floor setting to get rid of dirt. Avoid stiff brushes that can scratch the surface or wear down the finish.
For a deeper clean, a damp mop with a pH-neutral cleaner works well. Stay away from harsh chemicals like bleach or ammonia, as they can harm the clay. Make sure to wring out your mop well, as excess water can damage the tiles.
Refreshing Sealers to Prevent Staining and Wear
Even with good cleaning habits, the sealer on your floor will wear off over time. Refreshing the sealer is key to keeping the clay resistant to spills and stains. Check the sealer’s condition at least once a year, depending on your home’s activity level.
If water no longer beads on the surface, it’s time for a new sealer. Use a penetrating or topical sealer, but clean the floor first. Proper preparation ensures the new layer bonds well, protecting against future wear.
| Maintenance Task | Frequency | Recommended Action |
|---|---|---|
| Dry Sweeping | Daily | Use a soft-bristle broom |
| Damp Mopping | Weekly | Use pH-neutral cleaner |
| Sealer Inspection | Annually | Check for water beading |
| Deep Re-sealing | Every 2-3 Years | Apply fresh protective coat |
Conclusion
Authentic Saltillo tile adds a unique, earthy charm to any home. These handmade clay pieces bring a warmth that mass-produced materials can’t match.
Proper installation ensures these floors remain stunning for decades. We believe that paying attention to detail during sealing and maintenance protects your investment. This way, your floors stay beautiful despite daily wear.
Embrace the natural variations in every tile. These imperfections tell a story of traditional craftsmanship. They add character to your living space.
We invite you to enjoy your new flooring as it ages gracefully. Share your design projects with us. Show how you’ve integrated these rustic elements into your space.
FAQ about Complete Guide to Installing and Styling Saltillo Tile
Where exactly does authentic Saltillo tile originate?
Authentic Saltillo tiles come from Saltillo, Coahuila, Mexico. They are made by hand, using raw clay and sun-drying before firing. This process gives them their unique, natural colors.
What specific tools do we recommend for a successful installation?
For a professional look, use a wet saw with a DeWalt diamond blade for cuts. Apply a flexible thin-set mortar, like Custom Building Products FlexBond, for bonding. Always use a notched trowel for even mortar distribution.
How can we incorporate southwestern tile decor into a contemporary home?
Mix southwestern tile decor with modern furniture for a balanced look. Use the tiles as a warm base. This creates a “Modern-Rustic” style that’s both sophisticated and welcoming.
Why is a crack isolation membrane necessary during the subfloor preparation?
A crack isolation membrane, like Schluter-DITRA, protects the tile from subfloor shifts. It absorbs movement, keeping the tile surface crack-free for years.
What are the best mexican tile decorating ideas for kitchen and patio areas?
Use these tiles for flooring and backsplashes in kitchens for a warm feel. For patios, choose large-format tiles for a seamless indoor-outdoor look. Seal them well with Aqua Mix Sealer’s Choice Gold for durability.
How do we choose between penetrating and topical sealers for rustic tile home accents?
Penetrating sealers keep the natural look while protecting from within. Topical sealers offer a glossy finish and extra protection against spills. Choose based on your desired look.
What are some mediterranean tile decorating tips for enriching the floor’s texture?
Use floor lamps or wall lights to highlight the tiles’ unique features. Add natural textiles like jute rugs or wool throws to enhance the organic feel.
Can we use handmade clay tile decorations in entryways and mudrooms?
Yes, handmade clay tiles are perfect for entryways. They provide slip resistance and hide dirt well, making a warm welcome for guests.
How do we maintain the beauty of our floors with spanish tile home styling?
Regularly sweep with a soft-bristled broom and damp mop with Bona Hard-Surface Floor Cleaner. Avoid harsh chemicals and refresh the sealer periodically to protect the floor.